Thursday, July 31, 2008

Mochi Bread


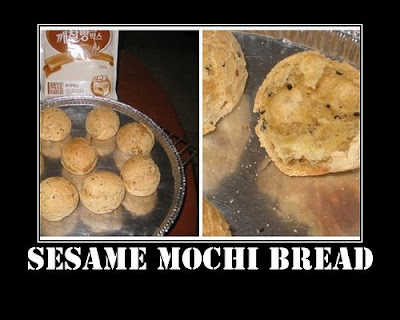
Ok, I'm a little behind time for the mochi bread craze. I had the package for so long but didn't have the urge to bake it till recently. Even then, I didn't post immediately. This precious bag of pre-mix is from my korean colleague's wife. I had asked to piggy-back on their grocery order (done online) and since it was out of stock, Mrs H spared me a package. Kam-sa-ha-mida.

It's really really easy to put together. Just add one egg and 70 ml of milk to the flour, knead together to form dough. Divide the dough into 40g a piece (*I will make them smaller next time, probably 30g each) and roll into a ball. Bake at 180 deg C for 25 mins. You'll get these precious little balls with a chewy interior. Super yums! My daughter asked me to bake more! Guess I would have to try my luck at some Korean supermarket...
Sunday, July 27, 2008

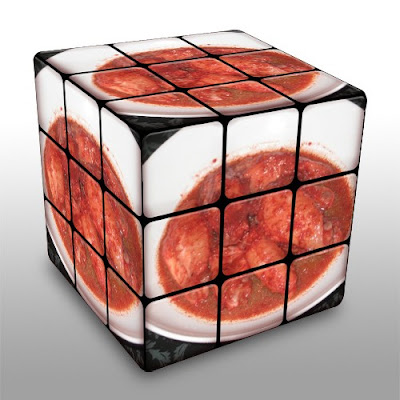
Hong Zhao Ji


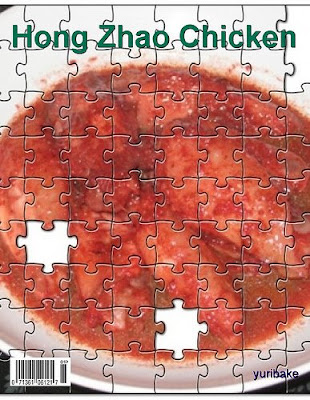
Thanks very much to Rei, she gave me a bottle of Red Glutinous Rice Wine and jar of wine lees. It's so kind of her to do so. She even posted a recipe on how to use these gems!

As we are not fans of chicken breast meat, I used 1 kg of chicken mid-wings instead. The dish is not decorated with cilantro nor scallions as we do not particularly like them. As a result, I tend to not remember to buy them.


I did not have the privilege of tasting this dish, 红糟鸡 after the birth of both my children, more than 10 years ago. My friend told me that her mom, who is Hock Chew, is looking for authentic Red Glutinous Rice Wine for her confinement in September. Of course, I'll be happy to hook her up with dear Rei and let them work out the details.

I tend to like stronger flavours in my food (重口味), so I followed the recipe exactly even though I had only 1 kg of chicken wings. As I had excess ginger juice left, almost 1.5 tbsp, I added it to the gravy. The gravy was a little bitter although it wasn't obvious. But we completely finished the portion I served tonight. I saved the rest in the freezer to be consumed in the weeks to come.

Friday, July 18, 2008

Mango Cake


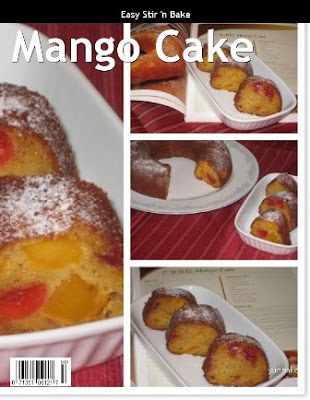
This is the latest craze among several bloggers, Easy Stir 'n Bake Cakes. Indeed these cakes are really easy to bake, tasty, and soft! I was worried that they were not baked. I baked 3 cakes between 5.30 pm and 9.30 pm tonight. No mixer required, just a whisk.

Of particular interest is this Mango Cake. Can you see the mango cubes? It makes the cake really really soft but I think I would just puree all the mango in future. I'm not sure if there's too much liquid in the batter, the cake looks a little like kuey. As I didn't have any mango essence, I used konnayku flavouring instead. I may just go and pick up a few more mangos to try this again.

Mango Cake

Ingredients
100g plain flour
3/4 tsp baking powder
1/2 tsp bicarbonate of soda
2 eggs
100g caster sugar (reduced by 10g, depending on mango's sweetness)
80 ml corn oil (I used 65g canola oil)
150g mango (diced)
50g mango puree
50g glazed cherries (chopped)
1/2 tsp mango essence (I used konnyaku flavouring)

Method
1. Grease a 20 cm (8 inch) cake ring.
2. Combine plain flour, baking powder and soda in a mixing bowl.
3. Combine eggs, sugar and oil. Stir into flour mixture with diced mango, mango puree, cherries and mango essence until well blended.
4. Pour mixture into prepared pan. Bake in preheated oven at 175 deg C for 35-40 minutes. Stand for 10 minutes and turning on to wire rack to cool.
5. Dust with icing sugar.

Source: Easy Stir 'n Bake Cakes by Kevin Chai

Wednesday, July 16, 2008

Celebrating 100 Posts


Celebrating Yuri's Bake Journal's 100th post today! Hip Hip Hurray! I cannot believe that I've reached this milestone in under a year. I raked my brain to find something to signify this achievement. I was somewhat happy that I was too busy and worn out with fatigue to bake last week.

My girl requested that I bake something for her CCA party on Friday, she asked for a
chocolate pie. But I wasn't keen to make pies, and definitely not the same pie again. Then I remembered seeing something interesting, check it out here. Now, that's something worthwhile and pretty to mark post number 100.

HOWEVER, that was not to be. Firstly, I am unable to steam bake the cheesecake, as my microwave oven is too small. So, I thought perhaps I could buy a no-frills cheesecake from the supermarket! Then I found out that I could get a cheesecake from one of the Japanese restaurants. Eventually, I bought a frozen baked cheesecake from the supermarket instead as I couldn't wait to try. I found that even though the cheesecake was frozen, it wasn't easy to work with it. The cake went soft so quickly and the balls just won't be round. I emailed
Passionate about Baking to find out about her experience. She provided some suggestions, but I didn't want to take the chance of having my girl bring sub-standard stuff to the party.

Then she recommended making chocolate coated cornflakes. Bingo! I remembered this from Nigella Lawson,
Chocolate Caramel Crispy Cakes. I had book-marked this recipe for so long, in fact, I had once bought 4 Mars bars thinking I would try it out. But the folks at home ate all the Mars bars before I could do anything! I was also very distracted then with many other things, possibly chiffon cakes.


And so, this Chocolate Caramel Crispy Cakes became the star of the 100th post. My daughter was very enthusiastic and she decorated them. She was so happy to finally have the chance to make use of my collection of toppings. She was the only one who tasted them and she said they were delicious. Of course, they are delicious, I added more chocolates, which explains the deeper colour. The aroma of chocolate was mesmerising as well, perhaps that was why I didn't feel like tasting any. She wants me to make another batch so that she can bring some to share with her primary school friends on Saturday.

Tuesday, July 15, 2008

Beef Ball Soup

What you see above is not what I started out to cook. I made a friend through flickr and she taught me a lot about cooking and baking. She also has exacting standards and a very discerning palate. I sometimes feel ashamed of my own cooking and baking. Perhaps it's due to my family's lack of demand for high standard food.

I used a combination of spices and method, this would be quite close to what I actually used/did. As there was quite a bit of watery gravy, I added more stock. I then added some japanese somen, beef balls, fish balls and bean sprouts. I also shredded the beef. Somehow, the beef didn't turn out the way it's supposed to. Perhaps I had cooked it in the pressure cooker for too long. But my folks liked it this way... so, it's a mistake that turned out well, don't you think?

Thursday, July 10, 2008

Pineapple Cake


The Pineapple Upsidedown Cake was the first cake that I baked when I started this baking and blogging journey. I love the taste and texture of it and have been wanting to bake it again.

I recently bought a cake ring, which to me, is very multipurpose -- can be used for cake or bread. As I didn't have time nor energy to bake any bread, I chose to revisit the pineaple cake. But I didn't have any pineapple rings, only pineapple cubes, so I laid them around the bottom of the pan. Of course, it would have been perfect if there were more diced pineapples.

It's a really simple and idoit-proof cake and I made half the recipe. Try it!

Pineapple Upsidedown Cake

Ingredients
240g butter
200g castor sugar
4 eggs
240 self-raising flour, sifted
4 tbsp pineapple syrup
Pineapple rings and glazed cherries

Method
1. Arrange pineapple rings into a lined and well-greased 22 cm round baking pan. Put half a red cherry in the centre of the pineapple ring. Keep aside.
2. Put butter and castor sugar into the mixing bowl and cream till light.
3. Add eggs one at a time, beating well after each addition.
4. Fold in sifted flour, 1/3 at a time. Mix in pineapple syrup till well-combined.
5. Pour cake mixture on top of pineapple rings and spread evenly.
6. Bake in a pre-heated oven at 180 deg C for 45 minutes till golden brown and cooked.
7. Remove, leave to cool before inverting it onto a serving plate to show the pineapple rings on top.

Source: Baking Made Easy by Agnes Chang

Sunday, July 6, 2008

Homemade Coleslaw

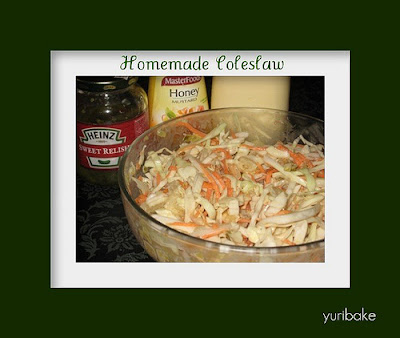
The truth is, coleslaw isn't something I would normally order, unless it comes free. As one would get with western food at the food courts. That was until I tried a homemade coleslaw by my friend's domestic helper. They served it along with the rest of the barbeque spread during their recent housewarming party. It was so refreshing, hubs could not stop eating, and neither could I. Perhaps we were famished.

Imagine my surprise when I came across this post by Cookbake Legacy. I was naturally curious and ventured to the original post where the recipe is. I was surprised by the ingredients that went into the dressing, other than what I dreaded most, mayonnaise. So I chose the Japanese version of mayonnaise, and used up the remaining of my honey mustard and bought a new bottle of sweet relish. Honey mustard is a regular item in my fridge and sweet reslish has, sadly, been out of my mind for some time now. Well, it's time for a happy reunion!

What I learned from my first experience in putting together coleslaw, size is everything! Gosh, I realised that one cannot simply cut the whole section of cabbage and hope that they are nicely thin. My first attempt was a mess and everything was HUGE. As I didn't even finish the quarter section of the cabbage, I tried to cut more finely what remaining cabbage there was. The picture you see above, that was the second attempt. Still much room for improvement, and I'm glad that the children enjoyed it, especially my son.

Saturday, July 5, 2008

No Venture, No Gain


It's my first attempt at Sponge Dough Method. In his book, The World of Bread, Alex Goh described that this method needs a longer preparation time. As a result, it produces a softer, bigger loaf which keeps longer.

Compared to previous wholemeal loaves, it does seem a little bigger. Softer, it is not. In fact compared to the picture found in 孟老师的100道面包, it's a far cry. Even from the photo in the book, one can see that the dough was rolled up nicely. For mine, the dough was too sticky to be handled. No matter how much I oiled my hands, the dough would still stick.

But this will not be the end of Sponge Dough Method for me, not just yet. I was probably a little too eager and didn't allow enough time for the first dough to proof, only 90 minutes (according to the recipe), a far cry from Alex Goh's recommended 2 to 4 hours. I shall post the recipe later, so that shifus out there can dissect the problem with the sticky dough.

Wednesday, July 2, 2008

Get it Rolling!

I have been a little under the weather lately, so haven't baked in many days. It's a case of the spirit is willing but the flesh is weak. But looking at everyone's bakes and blogs, I'm really motivated to pick up the whisk soon.

Have you heard or seen the Foodie Blogroll? It's a wonderful network of people who share the same passion in baking, cooking, and well, food in general. I haven't had much time and energy to check out the Foodie Forum yet, but this journal
been getting many new visitors. It's a facinating way to connect with more people, or just blog-hop for inspirations!

Try it today.